Inbound Route
Create an Inbound Route to Secure PCI-Sensitive Data
- If not already logged in, log into your VGS Dashboard (https://dashboard.verygoodsecurity.com).
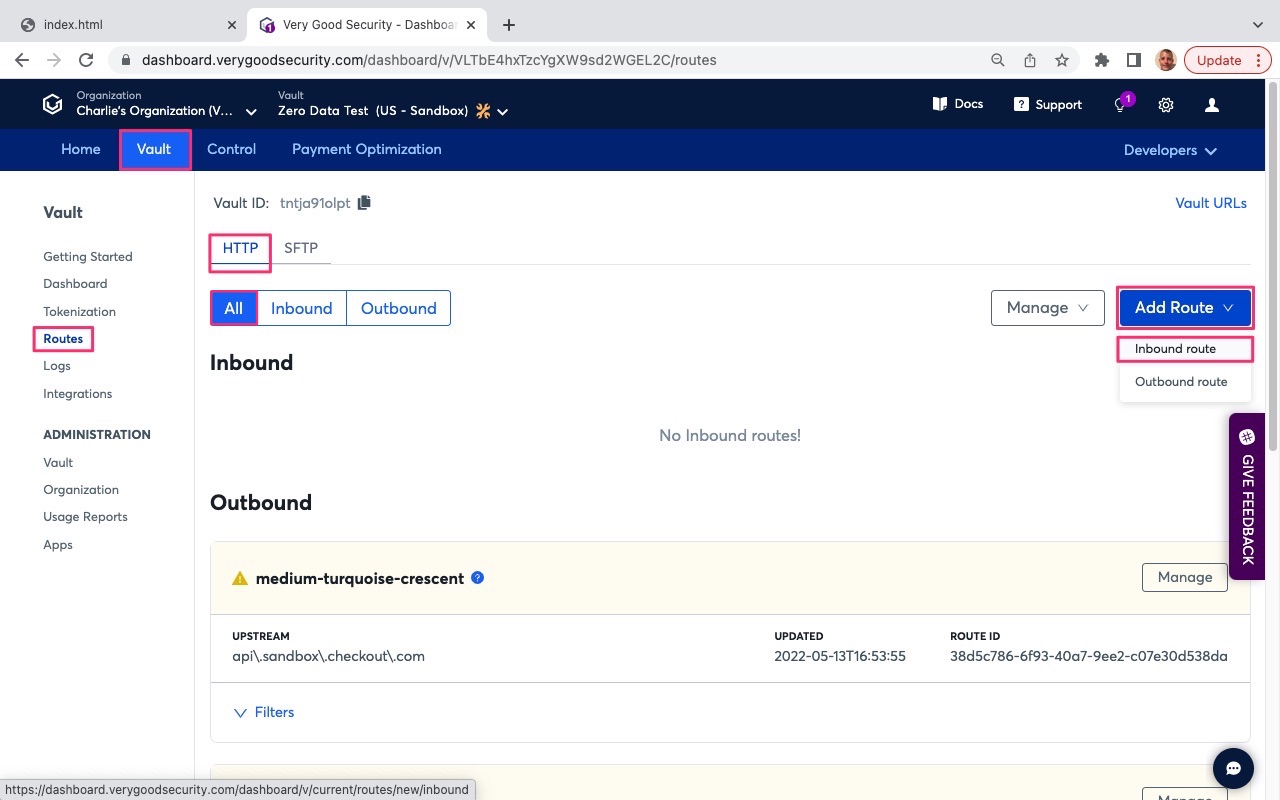
- On the top, left-hand side, just under the organization name, click on the “Vault” tab.
- On the left-hand side, under “Vault”, click on “Routes”.
- At the top, just under the “Vault ID”, select the “HTTP” tab.
- On the right-hand side, click on “Add Route” and select “Inbound route”.
- The following picture highlights, with red boxes, the areas to select/modify in steps #2 through #5.

- Under Upstream Host, review the setting pointing to the VGS Sandbox Echo Server (https://echo.apps.verygood.systems). The upstream host identifies where to forward the API call after the sensitive data is secured/aliased. In this step, we are setting the upstream host to a cloud echo server that will return whatever it receives to the client-side application.
- Scroll down to “Filters”.
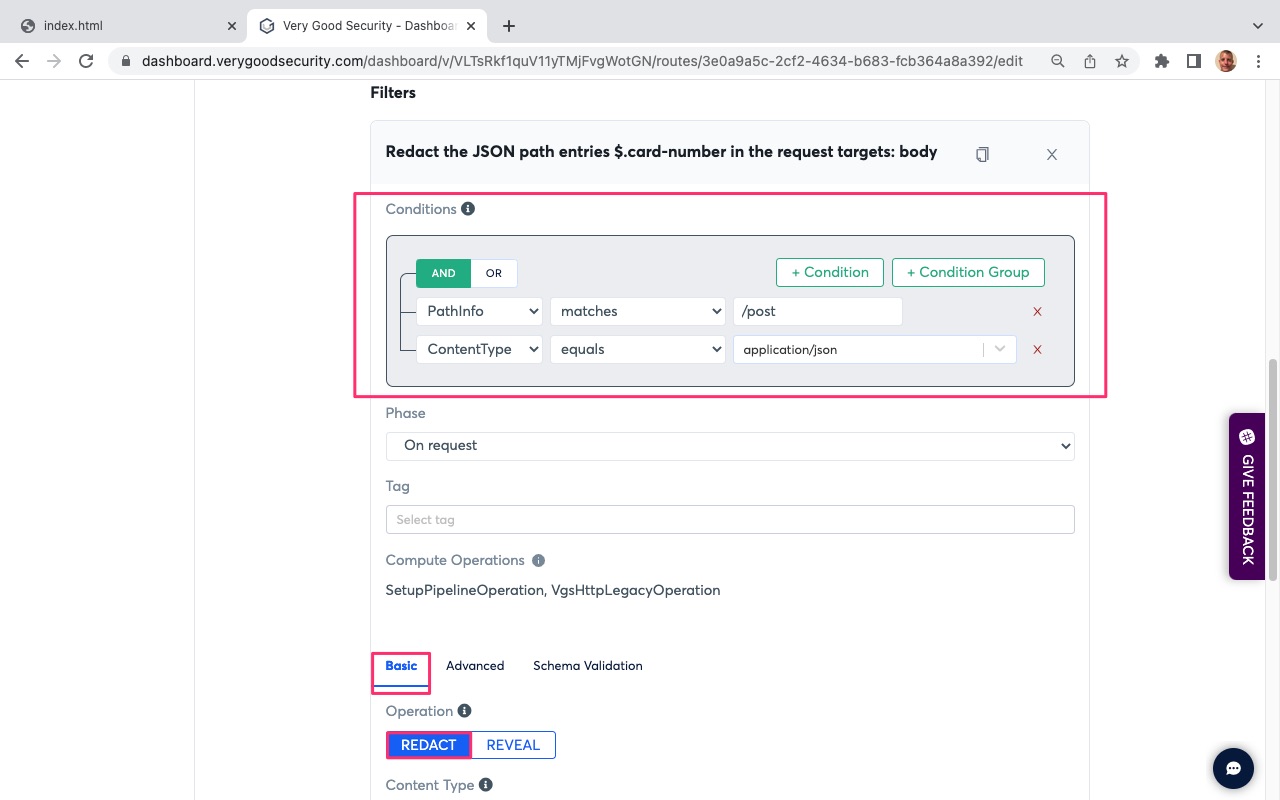
- Under “Conditions” in the default filter, note the following settings:
- PathInfo matches “/post”. This points to your server-side API endpoint destination.
- ContentType equals “application/json”. This defines the content type of the request.
- Phase: “On request”. This defines the API phase. In this case, this filter will trigger on initial API call.
- Scroll down and select the “Basic” tab below “Tag”.
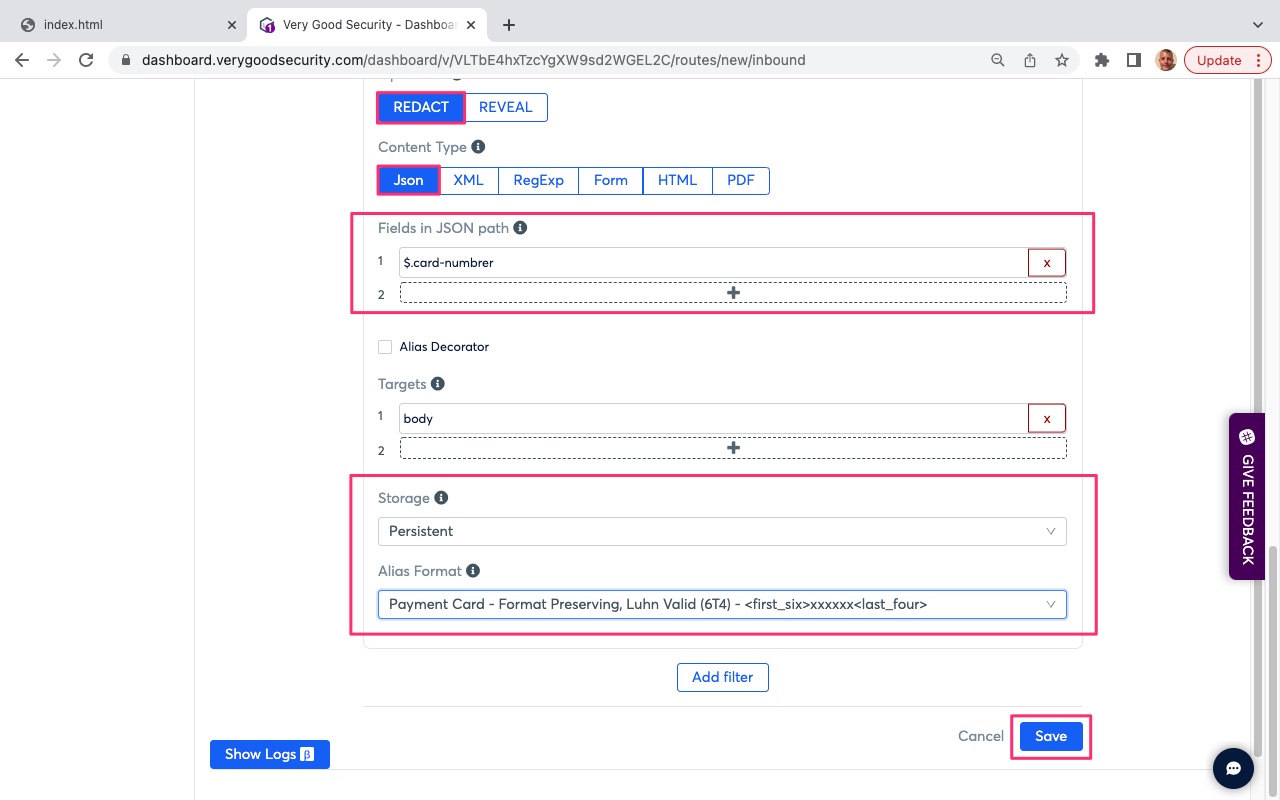
- Under “Operation”, select “REDACT” to secure sensitive data.
- Under “Content Type, select “Json” to identify the content type of the request.
- Under “Fields in JSON path”, enter “$.card-number” into field 1.
- Scroll down to “Storage” below “Targets”.
- Click on “Storage” field and select “Persistent”. Persistent storage means that the sensitive data will be stored permanently unless a delete request is received to remove it. PCI rules allow VGS to store the PAN for its customers. Our customers then oeprate on the PAN alias.
- Under “Alias Format”, click the field and select “Payment Card - Format Preserving, Luhn Valid (6T4).
- Scroll to the bottom and hit “Save” in the bottom, right-hand side.
- The following pictures highlights, with red boxes, the areas to select/modify in steps #7 through #18.


Congratulations, you have finished this section.